Alaska 8 Day Mountaineering Course Planning
Mt. Francis (10,450 ft.), Kahiltna Dome (12,525 ft.), Point Ferene (9,300 ft.), Control Tower (8,670 ft.), or Mt. Crosson (12,800 ft.)Meet Times & Transport
You will need to spend the night before the course in Talkeetna, which is approximately 100 miles north of Anchorage (2 hour drive). Talkeetna is a very small town with limited facilities; we advise that you arrive there with all your food and gear for the course already purchased.
From Anchorage to Talkeetna
Fly to/from Anchorage, Alaska (ANC). Flight reservations should be made as soon as possible.
Arrival: You should arrive in Anchorage one day before your course start date, landing by 4:30 pm at the latest. You may also consider arriving an extra day early to chase lost luggage and have a day to relax. All climbers should make a reservation with one of the shuttle services listed to transport you from Anchorage to Talkeetna. Please make your shuttle reservations soon after purchasing your flights, as this shuttle can get fully booked.
We recommend you stay in Talkeetna the night before your climb begins. We advise booking your accommodations well in advance. Talkeetna hotels and lodges can fill up quickly during summer months.
Please download WhatsApp to your cell phone before arriving in Alaska. The evening before your Gear Check in Talkeetna our staff will start a group text message thread on the WhatsApp messaging app including all climbers as well as your lead guide. Please download WhatsApp and look out for our message the evening before your Gear Check.
Departure: Plan to depart from Talkeetna the day after the last day of your course. All flights out of Anchorage should be scheduled after 1:00 pm. You should plan to stay in Talkeetna the night that your course concludes. The next morning you can shuttle from Talkeetna to Anchorage to catch an afternoon flight (after 1pm). These return shuttle reservations don’t need to be reserved before your trip, they can be set up with Talkeetna Taxi once you’ve flown back from the glacier at the end of your course.
Delays: Flights to and from the glacier are subject to delays at any time. Please note the possibility of having to remain on the ice or in Talkeetna for an extended period, and ensure your flight arrangements can be changed.
We meet at 9:00 am on Day 1
The Alpine Ascents van will pick climbers up from their hotels at 8:30 am on Day 1 of your climb and shuttle to our facility. Orientation will start at 9:00 am at the Alpine Ascents facility, located just outside of Talkeetna. If you are driving yourself, this drive is approximately 15 minutes.
Climbers can store any personal belongings at our Talkeetna facility for the duration of their expedition.
Lodging in Talkeetna
Staying downtown will give you access to the small shops and restaurants on Main Street. Our Alaska Operations staff will pick you up in Talkeetna and shuttle you to the Alpine Ascents facility outside of town. Please be aware that there are no standard taxi/ride-share options in Talkeetna.
Some hotels we are familiar with are recommended below. You are welcome to find others in the same general area. Please let us know where you choose to stay so that we can schedule a shuttle pickup for you, if needed, on Day 1 of your course.
Downtown Area
Talkeetna Inn
talkeetnainn.com
Traditional, affordable rooms with forested grounds right on the Susitna River waterfront a few blocks from Main Street.
Talkeetna Cabins
talkeetnacabins.org
A grouping of cabins that each fit 3-5 people, great for climbers who are traveling in a group.
Latitude 62
latitude62.com
Budget-friendly rooms with a rustic feel. The people are friendly and the place is clean.
Talkeetna Hideaway
talkeetnahideaway.com
Talkeetna East Side Cabins
talkeetnaeastsidecabins.com
Swiss Alaska Inn
swissalaska.com
Just Outside of Town
Talkeetna Alaskan Lodge
alaskacollection.com
One of the largest lodges in the area that will likely have rooms available. More upscale than the downtown options, this lodge is used by the major cruise ship travelers. Located 3 miles out of downtown.
In Anchorage
Should you need to lodge in Anchorage before or after your climb, the Millennium is a quality hotel that offers free airport shuttle.
Millennium Alaskan Hotel
millenniumhotels.com
Gear Check begins at 9:00 am
Orientation and gear check will start at 9:00 am on Day 1 of your course at the Alpine Ascents facility just outside of Talkeetna. The Alpine Ascents van will pick you up in Talkeetna at 8:30 am to shuttle you to our facility. If you are driving yourself, this drive is approximately 15 minutes.
Gear check will last approximately 3 hours. After gear check, we will drive you and your guides to downtown Talkeetna for lunch. We then have a climb briefing at the National Park Ranger Station, and then on to the airport to catch your flight to the glacier (weather permitting).
You are required to attend the gear check meeting. We will distribute and fit rental gear, do a thorough assessment of your gear, provide packing instruction, check personal menu items, and review the route and trip itinerary.
You may attend the gear check in your normal street clothes. We have storage for reasonably sized luggage while you are climbing, so please bring a duffel bag/suitcase to store any personal items you do not wish to take on the mountain.
What to Bring: Please bring all of your gear to gear check. Note that you do not need to pack carefully beforehand, as we look at every item together. Rental gear will be picked up at gear check. You are responsible to bring all gear on the Gear List (including food) except what you rent from Alpine Ascents.
Packing your Climbing Pack
- Pack everything in two layers of sturdy plastic. (Trash compactor bags work best and are equivalent to two layers of plastic)
- Bring one large trash bag to completely and easily cover the inside of your pack.
- You will help carry some of the group equipment, so make sure there is some additional room in and on your pack.
Gear List
The weather in the Alaska range is unpredictable. With this in mind, we developed our gear list for the wellbeing and comfort of our climbers. There may be occasions when required items are not used because of current weather conditions, and the gear list prepares you for poor weather conditions.
You are required to bring every item on this list as described so be as precise as possible when packing. Alpine Ascents rents quality equipment at reasonable rates. Gear is also available for online purchase at the Alpine Ascents Gear Shop where climbers on an Alpine Ascents expedition will receive a discount.
If renting gear, your rental form must be submitted at least three weeks prior to expedition start date. Please call our office or email [email protected] with any questions.
Note: Gear is virtually impossible to buy in Talkeetna, so it is extremely important that you be fully outfitted before arrival.
Due to the unique nature of Alpine Ascents’ Alaska program, some rental items requested may be picked up in Talkeetna at your gear check, and others may be shipped directly to you prior to your trip. All equipment, whether shipped to you or picked up in Alaska, may be de-issued at the Alpine Ascents Alaska facility at the end of your trip.
Stoves, Tents and Cooking Utensils
These items, while required for your course, can be shared between two climbers to reduce pack weight. These pairings will be arranged at gear check the morning of your course. Please be aware of this possibility to share these items.
Food in the Mountains
While all of our expeditions do include meals, our courses serve a broader function of teaching sustainability and self-sufficiency in the mountains. For this course, you will be responsible for bringing and cooking your own food. Guides will review all food items at the gear check. The shuttle bus from Anchorage “usually” stops at a grocery store in Wassilla for about 20 minutes. This is a great time to purchase heavy, bulky or fresh food items like canned goods, sauces, breads, blocks of cheese, meats, etc. We still recommend you bring a majority or your food from home to reduce both cost and time/stress involved in packing for 8-days in the Alaska Range.
For the 8 Day Alaska Mountaineering Course you will need:
7 Breakfasts
8 Lunches
7 Dinners
Emergency Rations: we recommend you bring 2 additional days of food in the event our return flight from the Alaska Range to Talkeetna is delayed by poor weather.
Food Shopping
We advise you bring all food with you to Talkeetna as it is easier and more cost effective to shop before arriving. When shopping for expedition food, remember it is better to err on the side of too much food instead of too little! You should buy food for 1–2 days beyond your course. As part of your gear check, our guides will review your food and meal plan to ensure you are eating enough during the program. Please use the menu guide carefully and take time to plan all meals. We encourage you to call our offices with any questions.
Big Helpful Hint: As we fly into the glacier very close to our base camp, you can bring and eat many of the same foods you eat at home. Climbers wishing to bring home style meals should have experience cooking these meals on a camping stove in a wilderness environment. In many ways you can think of this as a place to bring “luxury food” as compared to other mountaineering/camping experiences in that you do not have to carry food a great distance.
For recommendations see our menu planning guide.
Basic Principles
Good nutrition is essential in the mountains. Climbing requires significant energy, and eating well and often helps sustain energy, stay warm, and keep you feeling good throughout the course. Food needs vary widely from person to person. Some climbers eat more than others, and foods that work well for one person may not work for another. Rather than prescribing exact quantities or calorie counts, we recommend using the following principles to plan your meals:
Bring enough, but don’t overpack
Running out of food is no fun, but neither is carrying food you won’t eat. Consider both the weight and volume of everything you bring.
Balance taste, weight, and space
Every food choice involves some compromise. Freeze-dried meals are lightweight and easy to prepare, but they’re only a good option if you enjoy eating them. A block of cheese packs down smaller than the same weight in shredded cheese. Choose foods that pack efficiently and that you’ll look forward to eating.
Bring food you like
Eight days is a long time to be unhappy with your meals. If you don’t enjoy something at home, you probably won’t enjoy it more in the mountains.
Test your meals ahead of time
Portion sizes are personal. Try a few breakfasts, dinners, and trail snacks at home before your course so you know how much food leaves you satisfied.
Condiments
Salt, pepper, mustard, hot sauce, sugar, and other single serving condiments can make simple meals much better. Individual packets or small screw-top containers are lightweight and easy to source/pack.
Hot Drinks
Hot drinks are a welcome part of breakfast and dinner and can help with hydration. Instant coffee (we recommend Starbucks VIAs), tea, yerba mate, hot chocolate, and powdered chai are all good options. Plan for roughly 2–5 hot drinks per day.
Food Storage
Meats and cheeses can work well on this course, with snow often available to help keep food cool. Remove unnecessary packaging before your trip and repackage food in Ziploc bags. A few small or medium stuffsacks can help keep food organized in camp.
Drinking Water
Consider bringing electrolyte tablets (like Nuun hydration) or drink mixes to add to your water. Staying hydrated while climbing is extremely important and will be emphasized throughout the course.
Sleds
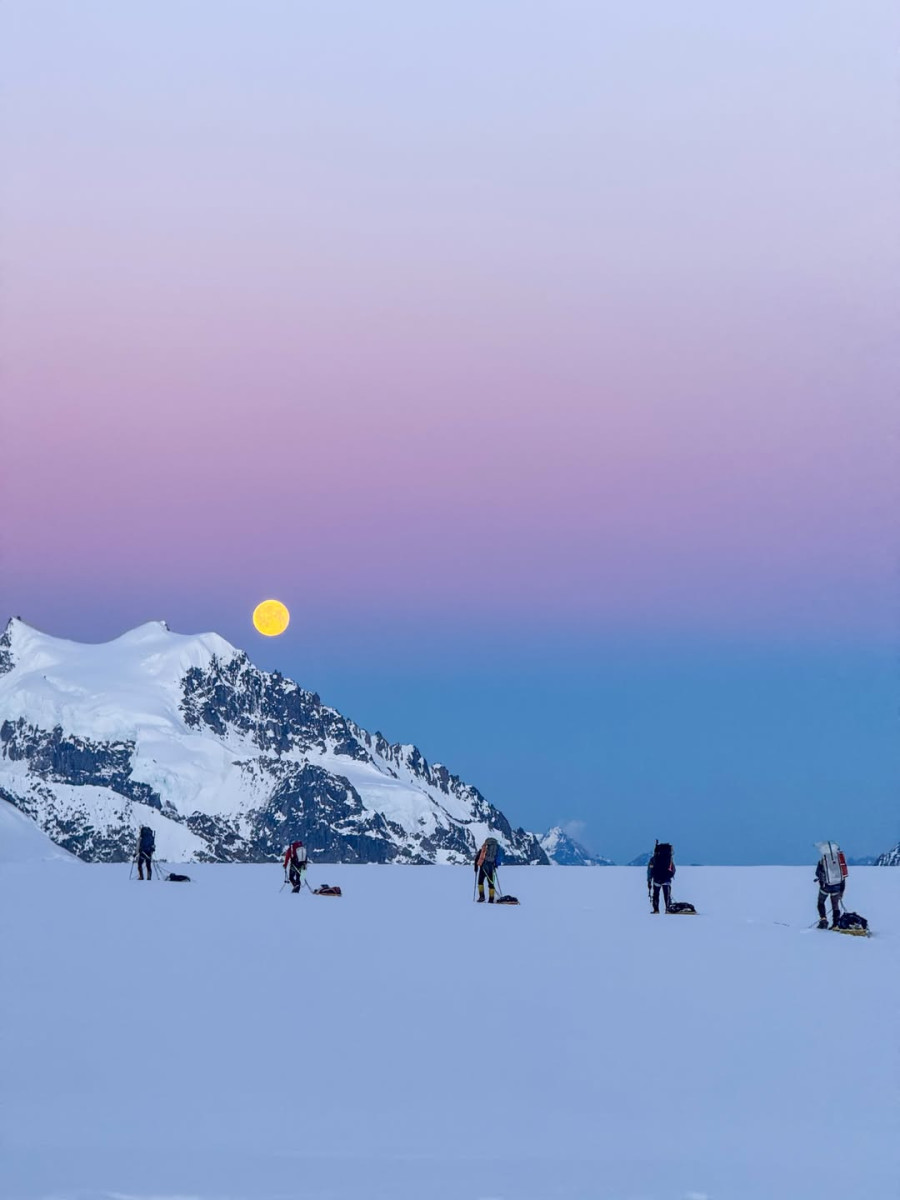
In order to make our training as specific as possible, we will use sleds to navigate the glaciated terrain of the Alaska Range. One of the advantages to using sleds is to allow us to carry bigger loads compared to using backpacks only. This allows us to bring heavier, more luxurious food items on this training course.
Menu Plan
See this example packing video for a similar length mountaineering course.
Having a hot breakfast is important, especially in cold weather environments. Most climbers go with instant or quick cooking hot cereals like oatmeal or Cream of Wheat, or dry cereals and powdered milk mixed with hot water. All of these meals taste better and provide more calories when fortified with dried fruits, nuts, honey, butter, even chocolate chips! Tastier (and heavier!) breakfast ideas are included below.
For your course you should have 7 breakfasts. About half of these should be basic meals to carry higher on the mountain and the remaining can be more luxurious meals at the beginning if the trip when we are lower. Don’t forget your hot drinks!
Breakfast Ideas
- 1 cup of granola + freeze dried fruit + 3 tablespoons of powdered milk mixed with hot water
- 2 packs of instant oatmeal + dried fruit + nut butter
- Dehydrated breakfast meal (check serving and calories)
- 2 packs of instant grits + bacon crumbles + cheese + butter + salt and pepper to taste
- 2-4 powdered eggs + 4-6 strips precooked bacon + tortilla
Lunch begins just after breakfast and ends just before dinner. It is the most important meal of the day and needs to have enough variety to keep you happy over your trip. Continuous eating of small quantities will keep up your energy levels for the whole day, especially on big travel/summit days where we will be on the move for 8 hours or more.
For your course you need lunch food for 8 days. Determining the amount of lunch food to bring is difficult to gauge on your first mountaineering expedition. General guidelines are given below. The rule many guides work with is the weight of your lunch food should be equivalent to the weight of your breakfast and dinner food added together.
Each day it’s nice to have a “real” food item. You may consider some of these tasty sandwich/wrap combinations:
- Start with a hearty bread product: flatbread, bagel, naan, flour tortilla, croissant, or pita pocket
- Add protein: hard cheese, Laughing Cow cheese wedges (no refrigeration needed), cured meat, black beans or hummus, nut butter (we like Trail Butter because it comes in a squeeze pouch), tuna pouch, or smoked salmon
- Add flavor/texture: dried fruit, chips, hot sauce, mustard, or pesto. Also consider, a hearty pre-made sandwich, leftover pizza, or a burrito for the first day of the course
In addition, pack snack foods to supplement any sandwiches or wraps, such as:
- Nuts (cashew and almonds are our guides’ favorite – can buy in 1lb quantities at Trader Joe’s)
- Jerky – beef, turkey, bacon, salmon, and tofu jerky are all great options
- Dried fruit (Trader Joe’s has an excellent selection prepackaged by weight)
- Peanut butter filled pretzel chunks
- Trail mix
- Cheese sticks/squares
- Plantain chips
For summit day or big travel days (approximately 4 on a 8 Day Course) focus on energy rich food. On these days we travel for roughly an hour between breaks. At each break you should be eating 200-300 calories (or about 1 energy bar). These days can have 4-8 breaks.
These foods include:
- Energy bars – focus on bars with real ingredients. We love Probars, Pure Organic, Kit’s Organic, Larabar, and Chia Bars. If you are ambitious, try making your own!
- Energy chews (Shot Bloks etc)
- GU’s, Cliff Shots, etc.
- Candy bars (Snicker’s are a favorite)
- Gummy bears
Not sure where to start? Check out this video to see what we pack for lunch on a 3-Day Mount Rainier climb. It’s a great starting point for planning your own mountain menu.
For the greatest preparation and cooking ease, freeze-dried food is an option. Usually, these foods only require adding boiling water, and are ready within minutes. Downsides to freeze-dried food are the cost, an increase in single-use packaging which must be packed out, uninteresting flavors or textures, gut issues from poorly re-hydrated meals, constipation, etc.
With slight more effort but vastly reduced cost, any supermarket can be tapped for a wide variety of wilderness-ready prepared foods. Items like Knorr rice or pasta entrees in envelopes cook in 5 to 10 minutes, and are very tasty. It is best if you experiment ahead of time at home, so that you know which you prefer. For those with a culinary creative streak, very tasty meals can be made up from scratch with only a minimum of additional effort. Items such as quick brown rice, quick or instant white rice, bulgur, instant precooked or dried beans, dehydrated vegetables, packaged or bulk sauce mixes, smoked salmon, exotic cheeses and whatever spices and herbs you like or want to experiment with can be combined for tasty meals.
You will need 7 dinners for your course. Many guides bring soup packets, like instant miso soup, for each meal (unless the meal is already soup-based). These make great pre-dinner hot drinks and help us hydrated. Don’t forget your hot drinks!
Dinner Ideas
- 1 packet instant ramen noodle soup + sweet and spicy jerky (shredded) + parmesan cheese + dehydrated vegetables
- 1 pre-pouched Indian Meal (we like Tasty Bites) + boil in the bag rice + coconut oil (vegetarian/vegan depending on meal choice)
- 1 box mac and cheese + sundried tomatoes + tuna packet + red pepper flakes
- 1 box cous cous + sundried tomatoes + pine nuts + chunks of salami
Don’t forget your 2 days of emergency rations!
It’s nice to have something sweet to eat while relaxing after dinner, perhaps enjoying an alpine sunset. Some consider sweet hot drinks dessert (hot chocolate), while others prefer instant Jell-O pudding, cookies, candy, or chocolate. Jell-O no-bake cakes or specialty cookies can also make a great dessert.
Vegan
Breakfast Options
- Breakfast grains + healthy fat (nut butter or coconut oil) + dried/freeze-dried fruit (strawberries, apricots, figs etc.)
- Granola + powdered coconut milk
Lunch Options
- Tortillas + dehydrated hummus + “cheezy” kale chips
- Bagel + nut butter + dried fruit
Dinner Options
- 1 box vegan mac and “cheese” + sundried tomatoes
- Dehydrated lentil soup + nutritional yeast flakes + hearty bread
- Tortilla + dehydrated black beans + boil in the bag rice + TVP
Vegan Freeze-Dried Options
- Alpine Aire: Santa Fe Black Beans and Rice, Veggie Burrito Bowl, Wild Quinoa Pilaf
- Backpacker’s Pantry: Louisiana Red Beans + Rice
- Mary Jane’s Farm: Lentils, Rice, & Indian Spice
- Good To-Go: Smoked 3-Bean Chili, Bibimbap, Herbed Mushroom Risotto
Park Entry Fee
You can pay your entrance fees on line using the Pay.gov – Denali NPP Weekly Park Pass. You should state clearly who you are climbing with, as well as your trip’s start date, using the Business Name field (“Alpine Ascents”). The entry fee will state it’s for 7 days, but you only need to purchase one pass. Those 7 days cover when you are allowed to enter the park (i.e., over the course of those 7 days), not the total duration of your stay.
If you have a National Parks Pass, please send a photo/scan of the signature side, as this will cover your entry into the park.
Training
The most important preparation you can do for your course is training. This is an extremely rigorous climb and being in strong physical condition is mandatory for personal concerns, success, and team compatibility. Students who have properly trained will also be better equipped to learn and retain the technical material covered. If this kind of training is new for you, we strongly recommend working with a trainer/coach that has a background in mountaineering. Steve House and staff at Uphill Athlete are experienced industry professionals we highly recommend.
Knots to Know
We recommend learning the following knots and hitches before your course. Knowing these knots beforehand will help you focus more of your course time on learning their applications.
Figure 8 Follow Through
Clove Hitch
Double Fishermans
Alpine Butterfly


On the Mountain
Nights 1-7 at Camp(s)
Sleeping arrangements: Tents
Bathroom: Waste Kits
Cell coverage: Some camps receive limited cell service, however climbers should be prepared to be out of service for the duration of the course.
Leave No Trace
Alpine Ascents International practices Leave No Trace principles on all expeditions. As guides, we spend time teaching the environmentally appropriate Leave No Trace principles and practices. There is nothing more rewarding than working hard to get high into the mountains, reaching a pristine campsite, witnessing incredible views, and having the feeling that no one has been there before. Please read the seven LNT principles, and call the office if you have any questions about what you can do to plan ahead.
Tipping
Guides are permitted to accept and greatly appreciate tips. Your guide team is composed of two guides. They will pool all tips received. An average tip for the full guide team is $300-400.
Please be aware that we are unable to process tips by card. You are welcome to tip your guides with cash or via mobile payment such as Venmo or PayPal.