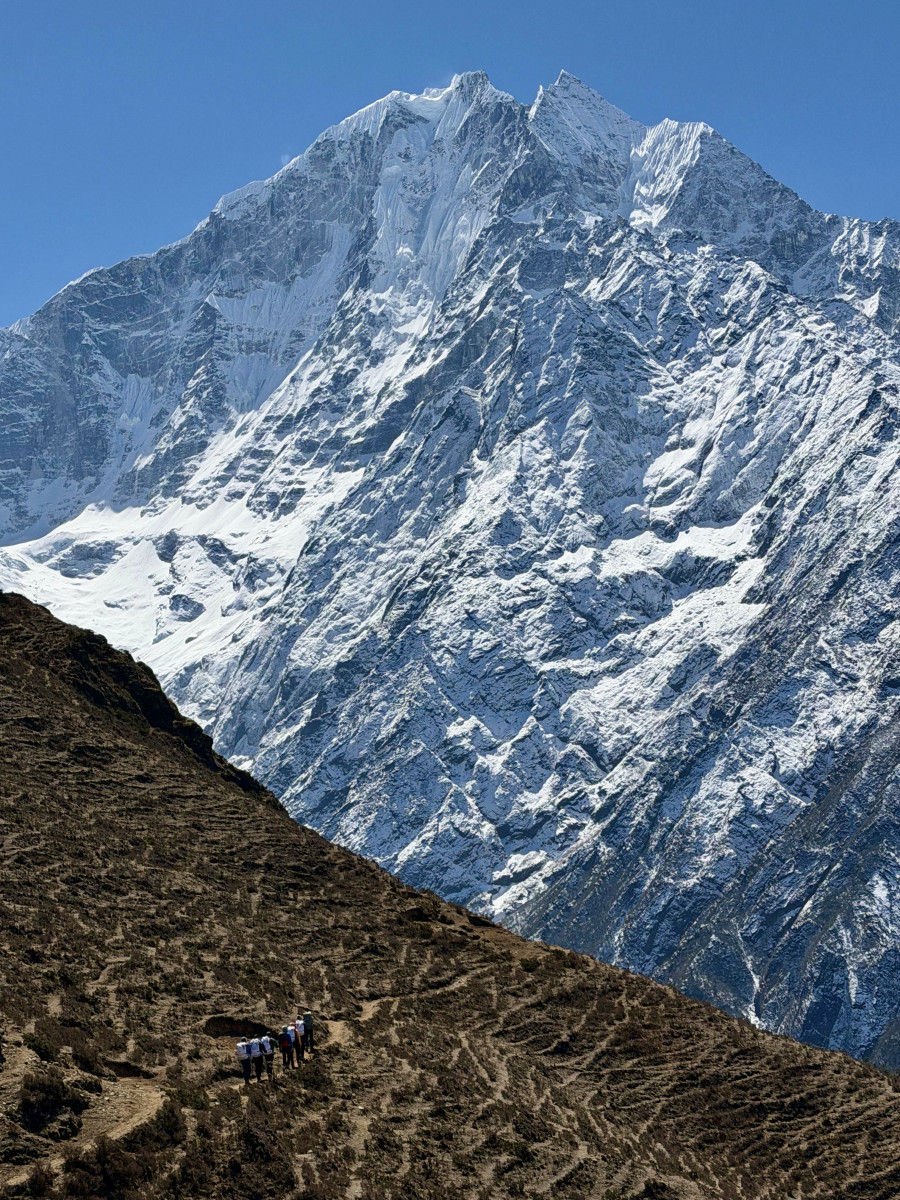
Ptarmigan Traverse Planning
11,000FT / 3,352M | Washington6:30 a.m. Gear Check Day 1 of the Climb
Meet at the Alpine Ascents Office at 6:15 a.m. for a mandatory gear check beginning at 6:30 a.m. on the day your climb is scheduled to begin. This gear check will last about 1.5-2 hours. You are required to attend this meeting. Please review the Gear Check information and come prepared.
Getting to Seattle
If you are flying into Seattle, SeaTac is the closest airport to our office. You are responsible for transportation between the airport and your hotel.
Getting from the Airport to the Office
Our office is 30-50 minutes from the airport (depending on traffic). Most climbers take a Lyft, Uber, or taxi directly from the airport.
Another option is taking the Light Rail (public transit) from the airport station to Westlake Station, followed by a Lyft/Uber/taxi the last 1.8 miles to the office. The Light Rail is $3 for this one-way trip and is easy to navigate from the airport.
Parking
Due to our location in the heart of Seattle, free parking can be difficult to locate in the vicinity of Alpine Ascents. Most parking is 2-hour metered street parking, and you may need to find a spot several blocks from our office. Please allow sufficient time before your gear check to park your vehicle.
Evening Return Day 7 of Climb
You will return to our office in Seattle usually between 5:00 p.m. and 10:00 p.m. on the last day of the climb.
Air travelers are strongly advised against booking flights out until the day after your climb concludes. Trip schedules will not be adjusted to accommodate return flights booked on the same day your climb concludes.
In Seattle
We recommend booking a room for the night before your climb and for the night your climb concludes. We will return to our office late on Day 7, between 5 p.m. and 10 p.m., and you can return to your hotel. We strongly advise against flying out until the day after your climb concludes. Trip schedules will not be adjusted to accommodate return flights booked on the same day your climb concludes.
Recommended Seattle Hotels
The MarQueen Hotel: One block from our office and often able to offer a discount for our climbers. They are helpful and familiar with our programs. Please book early as Seattle hotels can be fully booked in summer months.
Reserve by phone: (206) 282-7407 (888) 445-3076. Mention you are with Alpine Ascents to get a discount, if available.
Reserve online: The Marqueen Hotel. Use promotional code “Alpine” to get discount.
We are located in lower Queen Anne, downtown Seattle, and are a short walk or taxi ride away from many other hotels. You may elect to stay in any one of the numerous hotels in the area. You will be responsible for getting to our office for your gear check the day before your climb and morning departure on Day 1 of the climb.
Other Hotels Nearby:
Mediterranean Inn
(206) 428-4700
The Maxwell Hotel
(877) 298-9728
6:30 am Gear Check
Meet at the Alpine Ascents Office at 6:15 a.m. for a mandatory gear check beginning at 6:30 a.m. This takes place the day before your climb is scheduled to begin. This meeting will last approximately 1.5-2 hours.
Gear Check is required. We will distribute and fit rental gear, complete a thorough check of your equipment, provide packing instruction, check personal food items, and review the trip itinerary before heading into the field.
You may attend the gear check in your normal street clothes. We’ll change into our hiking clothes before departing for the mountain. We have storage space for reasonably sized luggage, so please bring a duffel bag/suitcase to store any personal items you choose to leave behind while you are on the mountain.
What to Bring: Please bring all of your gear to gear check. Note that you do not need to pack carefully, as we look at every item together. Rental gear will be picked up at the gear check. You are responsible to bring all gear on the gear list except what you rent from Alpine Ascents.

Check out this video that talks through the 3 Day Rainier gear list. The gear list for your climb is not exactly the same, but should give you a basic understanding of the gear you will need for your climb. Please refer to the link above when packing and preparing for your 7 Day Ptarmigan Traverse.
Learn how to pack like a pro.
Gear List
Our climbs experience highly variable weather. The gear list is developed for comfort and preparedness in all conditions. There may be occasions when required items are not used because of current weather. Your guide will adjust the gear requirements on Day 1 if necessary.
You are required to bring every item on this list as described, so be as precise as possible when packing. Alpine Ascents rents quality equipment at reasonable rates. Gear is also available for purchase at the Alpine Ascents Gear Shop. Climbers on an Alpine Ascents trip receive a discount.
Packing Suggestions
- Line the inside of your pack with sturdy plastic (trash compactor bags work best).
- You will help carry some of the group equipment, so make sure there is some additional room in and on your pack.
- Read our blog post on How to Downsize your Pack to balance weight with luxury items.
Gear Guide
For more information on the different pieces of gear and clothing needed for mountaineering, check out our Gear Guide.
Menu Planning
You are required to bring your own lunches. On-mountain breakfasts and dinners are provided on the climb. If you have any food allergies or requirements, please notify us in advance. Your climber application features a place to input this information, or we are always happy to speak with you directly.
Overview
Food is one of the basic pleasures of wilderness travel. There are countless options for putting together healthy and delicious meals for your trip. For most climbs in the alpine environment, we eat approximately every hour during brief rest breaks. This constant intake is the most efficient way to fuel our bodies and meter our energy output as we climb. We do not stop for long “lunch breaks.” Your lunches should not require the use of a stove while on the mountain.
Basic Principles
A climbing or backpacking outing in the wilderness requires higher energy expenditure on a daily basis than what you may be used to. Eating well and frequently not only sustains energy levels but also boosts morale and attitude. In addition, mountains often challenge climbers with inclement weather. It is important that caloric intake be high and regular to help avoid hypothermia and other cold weather or altitude-related problems.
- Your food should consist of a well-balanced selection of food groups. It is best to plan most meals with high levels of complex carbohydrates to provide the most efficient long-term energy production.
- Refined sugars and simple carbohydrates, found in candy and other items, provide quick, short-term energy.
- Proteins are necessary for good health, but not in the quantities that most eat. On a short trip (6–7 days) lower protein intake levels do not cause problems.
- Fats require much more oxygen and time to metabolize (especially at high altitudes) which can be an important consideration.
Consider foods which are light and compact. Balance this consideration with nutritional needs and packing foods which taste good to you. Packaging should be minimal, but without sacrificing good organization and weather-protection.
Alpine Ascents provides breakfasts, dinners, soups, and hot drinks for summit climbs. All team members will help carry a portion of the group food up to camps on the climb. You will be responsible for providing your own lunches for 7 days. Listed below are sample lunch menus and a packing list for your climb. It is extremely important to bring the listed calorie amounts, though the exact items you bring may vary according to your preferences.
7 Day Climb Daily Menu Sample
Here is a sample of the types of things people bring with them for their daily lunches.
Day 1
Plan to bring approximately 1000 calories of lunch food for this day.
• Fresh sandwich or wrap (tortilla + hard cheese + tuna/chicken packet)
• Jerky or roasted chickpeas
• Piece of fresh fruit
• Trail mix or mixed dried fruit
• Cold drink mix packet
Day 2
Plan to bring 600-800 calories of lunch food for this day.
• Tortilla or bagel with nut butter + honey
• Jerky or hard cheese
• Energy bar
• Small cookies/energy bites
Day 3
Plan to bring 600-800 calories of lunch food for this day.
• Crackers + hummus packet
• Hard cheese or tuna packet
• Trail mix or savory snack mix
• Candy bar or quick-carb chew
Day 4
Plan to bring 600-800 calories of lunch food for this day.
• Tortilla or bagel with nut butter + dried fruit
• Roasted chickpeas or jerky
• Energy bar
• Mixed dried fruit or candy
Day 5
Plan to bring approximately 1200 calories of lunch food for this day.
• Tortilla or bagel with hard cheese and nut butter
• 2 energy bars
• 1–2 energy gels or chews
• Savory snack mix (Chex Mix, corn nuts, pita chips)
• Optional: small canister of Pringles (if desired)
Day 6
Plan to bring 600-800 calories of lunch food for this day.
• Crackers + tuna/chicken packet
• Hard cheese or jerky
• Granola bar or energy bar
• Candy bar or dried fruit
Day 7
Plan to bring approximately 500 calories of lunch food for this day.
• Tortilla with nut butter or hummus
• Energy gel/chews
• Small trail mix portion or candy bar
Sample Lunch Packing List
This list is intended as a sample packing/shopping list to create a complete “lunch bag” suitable for a 7-day climb. These items can be used in conjunction or as a substitute for the above menu sample.
Proteins & Savory Items
Jerky (beef, turkey, or soy) – 8–10 oz
Tuna or chicken packets – 3–5 packets
Nut butter squeeze packs – 5–7 packs
Hard cheeses (cheddar, gouda, Babybel) – 6–8 pieces
Hummus packets (single-serve) – 3–4 packs
Roasted chickpeas – 2–3 bags
Carbs & Sustained Energy
Tortillas – 6–7
Bagels – 3–4 (mix with tortillas for variety)
Crackers (multigrain, wheat, pita) – 3 packs
Snacks
Trail mix (mixed nuts + fruit) – 3 cups
Mixed dried fruit – ½–1 quart
Savory snack mix (Chex mix, pita chips, corn nuts) – 1 quart
Energy bars – 7–10 bars (variety encouraged)
Granola bars – 5 bars
Cookies or energy bites – 4–6 packs
Sweets / Quick Carbs
Candy Bars – 4–5
Honey stinger chews or similar – 2–3 packs
Hard candies – optional for quick hits
Hydration
Cold Drink Mix (w/ electrolytes) 7 Packets
Recovery drink packets for long days – 1 -2 Packets
Miscellaneous
Gallon Zip-lock Bag 3 Bags
Small trash bag for wrappers
Caloric info: www.whatscookingamerica.net/NutritionalChart.htm
On the Mountain
All Nights of Traverse
Sleeping arrangements: 2 per tent.
Bathroom: Go Anywhere Waste Kits (pack it out).
Cell coverage: Little to no cell coverage.
Leave No Trace
Alpine Ascents International practices Leave No Trace principles on all expeditions. We believe that given the proper information most people will do all they can to help protect and maintain the environment. Before your climb, please become familiar with Leave No Trace:
7 Principles of Leave No Trace
As guides, we spend time teaching the environmentally appropriate Leave No Trace principles and practices. There is nothing more rewarding than working hard to get high into the mountains, reaching a pristine campsite, witnessing incredible views, and having the feeling that no one has been there before.
Conversely, there is nothing more disheartening than working hard to climb a mountain, reaching a site and encountering trash, food waste, and toilet paper. Please read the seven LNT principles, and call the office if you have any questions about what you can do to plan ahead.

Tipping
Guides are permitted to accept and greatly appreciate tips. Your guide team is composed of three guides. They will pool all tips received. An average tip for the full guide team is $150-200.
Please be aware that we are unable to process tips by card. You are welcome to tip your guides with cash or via mobile payment such as Venmo or PayPal.

Ptarmigan Traverse Blog
More from the blog
Fueling The Climb: Nutrition for Mountaineering

Training for Mount Rainier (and Beyond): How to Train Smarter for the Mountains